Sunday, July 27, 2014

Recipe Inspired by Hell (Hell's Kitchen, that is)

While watching one of my favorite television shows, Chef Gordon Ramsay's Hell's Kitchen,  I couldn't help but crave scallops and risotto, which is one of the more often featured appetizer dishes made in the famous kitchen. I decided to look through my Chef Ramsay cookbooks for something similar. I came across Risotto of Herbs with Roasted Baby Scallops. The recipe sounded like just what I needed.

Adapted from "Gordon Ramsey's Passion for Flavour" (copyright 1996).


Ingredients:

Risotto -
2 c fish stock (I used More Than Gourmet Classic Seafood Stock, since I am too lazy to make my own)
2 medium shallots, chopped
3 tbsp olive oil
1 cup Arborio rice
1/4 c dry wine (I used Cupcake Pinot Grigio)
1 tbsp mascapone cheese
1 tbsp fresh parmesan cheese, grated

For finishing:

30 baby or 8-9 medium scallops (I used medium scallops)
1/4 c cream, lightly whipped (I used heavy whipping cream)
1 tsp each: chopped tarragon, chives, and basil

Herbs for risotto.
 2 tbsp balsamic vinegar (if desired)
salt and freshly ground pepper

1. Make the fish stock, being to a boil and then leave to simmer.

Easier than making from scratch .
2.  Wash and dry the scallops. Set aside.


3.  Make risotto base: Gently saute the shallots in the oil for about 2 minutes or until softened. Stir in the rice and cook for about 2 more minutes.

Aborio rice
Cooking the rice for a few minutes in the oil helps seal the rice and maintains its chewy quality.

Add the wine to deglaze the pan. Cook until the liquid is a syrupy consistency.

Deglaze with the white wine.

 Add a ladle of hot stock to the rice and stir until the liquid is fully absorbed.

Add the stock to the rice one ladleful at a time.

Once the rice has absorbed the liquid and appears dry, add another  ladleful and repeat until all the stock is gone. Make sure you stir constantly to prevent scorching. The rice should take on a creamy consistency. Total cooking time should be 20-30 minutes. When the rice is soft and creamy, add the mascapone and the parmesan cheeses. Mix in the whipped cream and fresh herbs. 

Mascapone, chopped fresh herbs and grated parmesan.

4.  When the risotto is almost finished, salt and pepper the scallops. Heat a pan with a little oil and butter over high heat. Once the fat begins to smoke, add the scallops. Sear for 1 1/2 minutes each side. The scallops should have a golden crust on each side and be translucent in the center. Do not overcook. 

5. Serve the risotto on warmed plates and add the scallops on the top. Drizzle a little bit of olive oil and balsamic vinegar around the plate if desired and serve.

Guaranteed to satisfy a craving!


I have to say this dish deserves a 4.5/5 stars. I think if I were to do it over, I would plan a bit better and make my own fish stock, perhaps Julia Child's recipe for White Wine Fish Stock. The seafood stock I used was a bit on the salty side and I would like more control over the amount of salt in the stock. I also should have seared the scallops a bit more evenly. But they were cooked to perfection inside.

My husband really liked this dish.


.


Sunday, March 30, 2014

How to Feel Chipper on a Rainy Day


One of my cherished cookie jars, a gift from a favorite aunt.
Today was a crazy Sunday day! I am use to unusual weather in Northern Virginia. But today it was raining and snowing several times throughout the day. I'm not talking about sleet...I'm talking snow flakes and rain drops at the same time!  I guess it's Mother Nature teasing us. Last Tuesday, we even got snow. It's been raining basically non-stop since Friday evening. I am so ready for spring to come and it's past due in the Old Dominion! 
I have been trying to trim down my collection of cookbooks and decided to purge the ones that don't have any pictures (I have to start somewhere, and besides, I am a visual person).  All the while, I was craving something simple to go with a good cup of coffee,  and I  thought about chocolate chips cookies which I haven't made in a long time. I wanted something besides the old Toll House recipe. I pulled the Macrina Bakery and Cafe Cookbook off the shelf. The Macrina Bakery has three locations, all located in Seattle. They have gotten pretty good reviews from Urban Spoon. The one thing I don't like about the cookbook is the lack of photos (very few and in black and white). 


This is one of their best selling cookies. I decided to make half the recipe as in the book, and to the other half I added toasted coconut. Did I mention I love coconut chocolate chip cookies?

Toasted coconut (I did 350 degrees for about 5 minutes with frequent turning)
Olivia’s Old-Fashioned Chocolate Chip Cookies
From Leslie Mackie’s Macrina Bakery and CafĂ© Cookbook, copyright 2003

“This recipe, Macrina’s version on the traditional Toll House classic, makes the best chocolate chip cookies I’ve ever tasted. The recipe is actually named after two special Olivias: my daughter and the grandmother of our pastry chef, Karra Wise.”

Makes 16 cookies.

2 ¼ cups unbleached all-purpose flour
1 teaspoon baking soda
1 teaspoon salt
3 cups semi-sweet chocolate chips
8 tablespoons (1 stick) unsalted butter, at room temperature
½ cup vegetable shortening, at room temperature
¾ cup granulated sugar
¾ cup light brown sugar
2 eggs
1 teaspoon pure vanilla extract

Combine flour, baking soda, and salt in a medium bowl. Add chocolate chips and mix well with a spoon. Set aside.

Combine butter, shortening, granulated sugar and light brown sugar in the bowl of your stand mixer. Using the paddle attachment, mix on medium speed for about 5 minutes, until the mixture is smooth and pale in color. Add 1 egg and mix until incorporated. Scrape down the sides of the bowl, then add the remaining egg and vanilla extract. Continue mixing until incorporated, about 1 minute. Remove the bowl from the mixer and scrape down the sides of the bowl again.

Using a rubber spatula, fold half of the dry ingredients into the dough. After the first batch is fully incorporated, fold in the rest of the dry ingredients and continue folding until all of the flour has been absorbed. Scrape down the sides of the bowl and cover it with plastic wrap. Chill in the refrigerator for at least 1 hour. At this point the dough can be formed into cookies or stored in the refrigerator for up to 4 days.


The dough is delicious, you can't help but eat a little (or more) of it!
 Preheat oven to 350°F. Line two rimmed baking sheets with parchment paper.

Scoop dough out of the bowl (I like to use a medium ice cream scoop) and roll the dough into 2-inch balls. Place 8 balls on each baking sheet, leaving 3 inches between each ball. Flatten the balls with the palm of your hand to about 1 inch thick. Place 1 sheet of cookies in the refrigerator while baking the other sheet.

Bake cookies, 1 sheet at a time, on center rack of oven for 15 to 18 minutes each. To help the cookies bake evenly, rotate the baking sheet every 4 minutes or so.

 
Make sure you rotate the cookie sheet to ensure even baking.

The finished cookies will be golden brown around the edges, and still light in the center. Let cool on the baking sheet for 15 minutes. The cooled cookies can be stored in an airtight container for up to 3 days.

Coconut and chocolate chip cookie.

 My scoop yielded 25 cookies (I think they were closer to 1 1/2" balls). They baked for about 14 minutes.

Okay, so we didn't exactly wait 15 minutes for them to cool. I mean, really, who can pass up warm chocolate chips cookies straight out of the oven?  These cookies were tested by my (ultimate cookie tester) husband who gave them the thumbs up.  This recipe is definitely a keeper, even though the cookbook probably isn't.  I plan on adding it to my box of cookbooks bound for the used book store to exchange for some with full color photos!

These won't last long!


Tuesday, March 11, 2014

Sometimes You Just Have to Wing It!

There aren't many cookbooks that arrange their recipes by season. But when I find one, I really appreciate the effort the author has made to divide the recipes to where you can use ingredients in their peak season.

That being said, this chicken recipe, from the book "Seasons of the Vineyard, Celebrations and Recipe"s from the Robert Mondavi Winery", is in the winter section, with the only seasonal part of it being the suggestion of accompanying this dish with winter greens. But I'm not complaining. This is a very simple and easy dish with tons of flavor. I had to wing it a bit (no pun intended), but it can be prepared in about 30 minutes (if you use my variation) and it will really impress your family as it looks like something you might get in a little French bistro.


Beautiful pictures and recipes arranged seasonally.
Chicken Breasts with Chardonnay and Tarragon, adapted from "Seasons of the Vineyard, Celebrations and Recipes from the Robert Mondavi Winery", copyright 1996.
The ingredients:

2 whole chicken breasts with skin
4 ounces Emmental or Gruyere cheese, grated
salt and freshly ground pepper
1 cup Chardonnay wine
3 shallots, diced fine
1 cup whipping cream
1 teaspoon dried tarragon
1/2 teaspoon mustard seed
1/2 teaspoon mustard powder
1/2 teaspoon lemon zest
1/2 teaspoon cracked black pepper

The recipe:

Preheat oven to 375 degrees.

Loosen the skin of the chicken breasts. Place the grated cheese evenly under the skin and pat down. Place the chicken in a buttered shallow baking pan. Salt and pepper the chicken lightly on both sides and reserve.

Combine the Chardonnay, shallots, cream and chicken broth in a non-reactive saucepan. Cook over medium-high heat until the mixture begins to thicken, about 5 minutes. Whisk in the tarragon, mustard seed and powder, lemon zest, and cracked pepper. Reduce over medium-high heat until the sauce is the consistency of light cream, about 15 minutes. Adjust the seasoning with salt and pepper. Pour the sauce over the chicken and bake until the chicken is just cooked through, about 25 minutes. Serve hot.

My improvised ingredients included stone ground mustard, lemon pepper, onion, and garlic
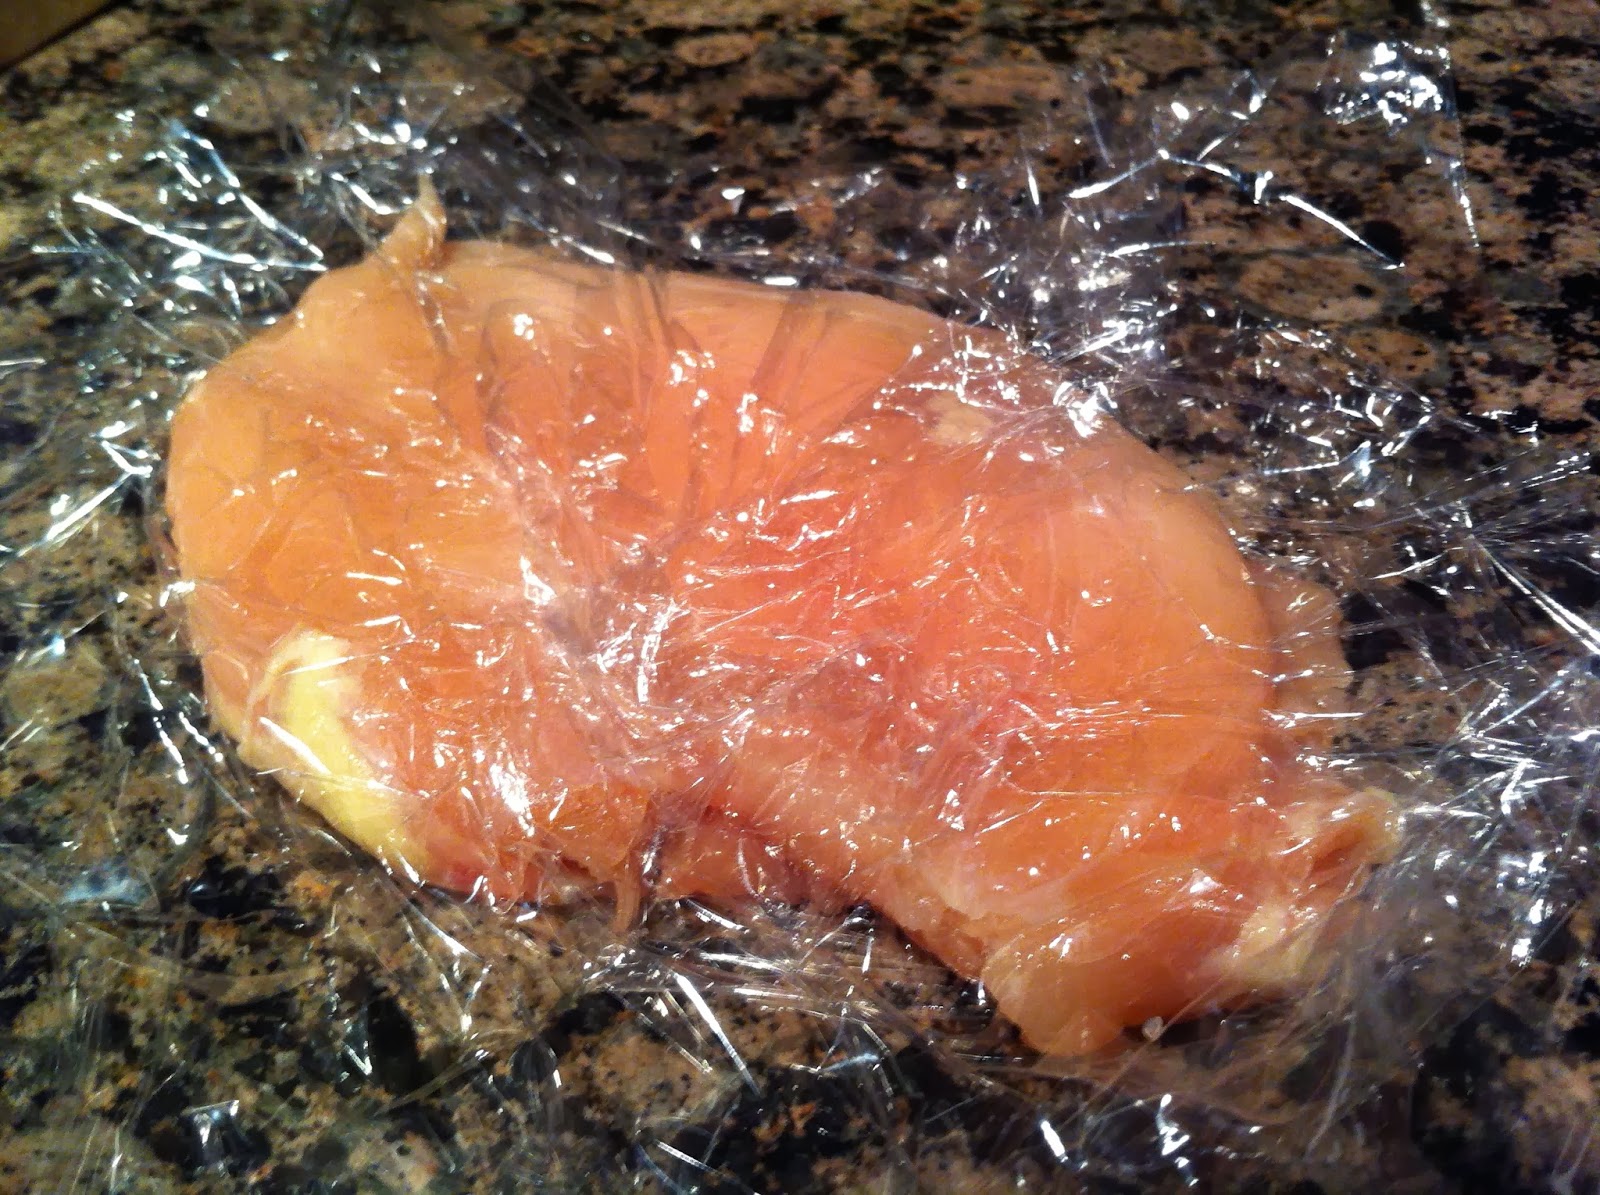
 Now here's where I had to improvise. I bought chicken breasts without skin, so that took care of having to place cheese under the skin. I decided to pound the breasts out to help them cook faster and I went ahead and slightly browned them for about 3 minutes on each side in a little olive oil (about 1 1/2 tablespoons) for some color in my copper saute pan over medium heat. Then I removed them and put them in a baking pan and into the oven.


Pound out chicken between layers of plastic wrap or waxed paper.

While the chicken was cooking, I prepared the sauce. I didn't have any shallots so I used a large clove of garlic (finely chopped) and about 1 1/2 tablespoons of finely chopped onion. I briefly (1 minute or so) sauteed this in the same pan I had browned the chicken in at medium-high heat. Then I added the Chardonnay (should I feel guilty for not using Mondavi?), cream and chicken broth to the same pan. Once it thickened around 5 minutes I added what I had on hand....fresh tarragon in place of dried (finely chopped, about a tablespoon), stone ground mustard, about 2 tablespoons (in place of the mustard powder and mustard seeds I did not have), and lemon pepper (1 1/2 teaspoons, in place of the lemon zest and the cracked black pepper I was also missing). Then this was reduced about 15 minutes over medium high heat and seasoned appropriately with salt and pepper. Then I reduced the temperature to simmer.

 
I didn't use a fancy Chardonnay.


Then I checked the chicken to be sure it was at the proper temperature (165 degrees), which it was. All I had to do was plate it. It sure was good!


Chicken breast with Chardonnay and tarragon, garlic spinach and spaetzle with cheese

Here is the recipe from the same book for the spinach. So easy!

Sauteed Spinach with Garlic

3 bunches fresh spinach (I used a bag of pre-washed baby spinach)
1 large garlic clove, peeled and cut in half lengthwise
4 tablespoons unsalted butter salt and freshly ground pepper
1 teaspoon lemon juice

If you use spinach bunches, make sure to wash it well and shake gently to remove the water. Since my spinach was already washed and dried this was not necessary.

Combine the garlic and butter in a large nonreactive pan with a lid and place over medium heat. When the butter has melted, add the spinach. Cover the pan for one minute, then uncover and stir until the spinach has wilted. Remove from the pan from the heat and season with salt, pepper and lemon juice. Discard the garlic and serve the spinach hot. 

Enjoy!

I've Gone Bananas (Again)!

My husband is always asking me to buy bananas when I go to the grocery store, but they aren't always used up before they turn spotted and brown, and frankly, I'm tired of making banana bread. I've made lots of variations on it, but lately it seems like I'm making banana bread at least twice a month. So now I'm looking at another (brown) bunch that needs to be re-created and I've decided to make a cake for a change.

This recipe is from the cookbook "The Modern Baker" by Nick Malgieri. He is a famous cookbook author and teacher of baking and pastry for over 30 years. Besides this book, I have another 6 of his cookbooks and his " Cookies Unlimited" one is one of my "go to" cookbooks during the Christmas holiday season.  Nick's Torta di Mele Ampezza was featured in my blog in October 2010.  


Adapted from "The Modern Baker, Time Saving Techniques for Breads, Tarts, Pies, Cakes, and Cookies" by Nick Malgieri, Copyright 2008

BANANA RUM COCONUT LAYER CAKE

Makes one 9" 2-layer cake, about 12 servings

Ingredients:
 
2 1/3 cups all-purpose flour
1 teaspoon baking powder
1/2 teaspoon baking soda
1/4 teaspoon salt
12 tablespoons unsalted butter, softened,
2/3 cup granulated sugar
1/3 cup dark brown sugar, firmly packed
1 teaspoon vanilla extract
3 large eggs
1 cup mashed banans (about 2 large)
2/3 cup milk
1 tablespoon dark rum (I used Gosling's Black Seal Bermuda Rum)


Ingredients- omit rum if desired

Set the oven rack in the middle of the oven and preheat to 350 degrees. Prepare two 9" round cake pans by buttering the inside and bottom, then line with a buttered piece of parchment or waxed paper. (Why use parchment? First it makes things easier to clean and second, it also makes sure your cake doesn't stick).

For the cake:

Combine the flour, baking powder, baking soda and salt.  Mix well. Set aside.

Combine the butter, sugars, and vanilla in the bowl of an electric mixer (I use my KitchenAid stand mixer).  Beat with the paddle on medium speed until lightened in color and texture, 3-4 minutes. Beat in the eggs, one at a time, beating well after each addition.

In another bowl, stir the bananas, milk and rum together until blended.  Decrease the mixer to lowest speed and add 1/3 of the flour mixture (why start and stop with dry ingredients? Click here).  Stop and scrape down the bowl and beater.  Beat in half of the banana mixture.  Repeat with another third of the flour, remaining banana, and then remaining flour.  Stop and scrape the bowl and beater. Increase the speed to medium and beat the batter continuously for 3 minutes.

Divide the batter equally between two prepared pans and smooth the tops.  Bake until the layers are well risen and deep golden, and feel firm when pressed in the center with a fingertip, 25-35 minutes.

Cool the layers in the pans on racks for 5 minutes, then unmold, turn right side up and cool completely on racks.


Fresh out of the oven.


Now here's where I decided to deviate from the recipe. This Banana Rum Coconut Cake uses a whipped cream topping and I don't have the room in the refrigerator to store a whole cake to keep the topping fresh. So I decided to go with something else. I thought a caramel frosting with walnuts would go perfect.

Recipe is from "The Lady & Sons Just Desserts" by Paula Deen, copyright 2006


Bobby's Caramel Cake (frosting part only)

1/2 cup (1 stick) butter
1 cup packed dark brown sugar
1/3 cup heavy cream, or more as necessary
1 16-oz box powdered sugar
1 teaspoon pure vanilla extract
1 cup chopped nuts (optional). For even better flavor, roast them in the oven at 350 degrees; walnuts, 8-10 minutes, pecans,5 minutes. Watch carefully so they don't burn.
  
Ingredients for caramel frosting, very simple!
Melt butter in a saucepan over medium heat and stir in brown sugar and cream.


 Bring to a boil, and transfer to a mixing bowl.

 
Add powdered sugar and vanilla. Beat with a handheld mixer until it reaches a spreading consistency. At this time it might be necessary to add a tablespoon of heavy cream or more, if the frosting gets too thick. Just be sure to add the cream in small amounts. Note: I did have to add more cream, about a tablespoon as the frosting is quite thick. I added a teaspoon at a time. I also think next time I will sift the powdered sugar, I had a few little lumps as you can see in the picture.
 
Caramel frosting.


 Frost cake and sprinkle with chopped nuts if desired.


I must say that this cake came out perfect. And I couldn't stop eating the leftover frosting. 
This cake would make a lovely dessert for a dinner party or even an old fashioned picnic. This recipe is going to be a keeper!
 

My thought: For the original recipe, the cake will need to be kept refrigerated as the coconut whipped frosting will melt if left out. I would either make the cake for a large crowd knowing it will be gone or make it in a sheet pan so it will fit in your refrigerator better if you need to keep it for a few days. Or better yet, turn it into cupcakes!


Thursday, January 30, 2014

A Simple Italian Supper and Memories of the Amalfi Coast

What can be more comforting on a cold winter's day, than a hot, baked pasta dish? Looking through my vast collection of cookbooks, I pull one of the shelf, remembering a past trip to Italy.

Back in 2003, I was lucky enough to go on a tour of the Amalifi Coast with Arts Boston (they no longer do tours). The Amalfi Coast is a stretch of coastline running along the southern coast of the Sorrentine Peninsula in Italy. The land route runs from Vietri sul Mar to Positano (25 miles of windy roads). This lovely area is known for it's famous limoncello (from the cultivation of lemon groves on the terraced, steep hillsides), hand-made paper (bambagina) and, of course, the beautiful ceramics of Vietri.

The gorgeous hillside of Positano.
View from a restaurant in  Ravello.
Villa Cibrone in Ravello.
Pottery from Vietri with the fabulous lemons.
View of the terraced lemon groves.
One of the things I enjoy about traveling is collecting cookbooks from the places I travel. Sometimes I will even pick one that is in the native language (I picked up two on this trip; one in Italian, and one in English).

Our tour stayed in a hotel close to the center of the town of Amalfi. One of the highlights of Amalfi is the beautiful cathedral, Saint Andrews Cathedral (or Duomo).
Cattedral di Sant'Andrea.
While I was in Amalfi, Helen Hunt was making a movie (available on Netflix streaming) called "A Good Woman". Some of my lady friends and I were down by the duomo when she was filming a shot with the young male lead. I can't remember if the scene made it into the final cut of the movie. I do remember we were all giddy about watching the rather handsome Stephen Campbell-Moore in a tuxedo  We also watched part of the filming down by the water across from our hotel one evening where they were shooting a night scene on a large wooden ship.
View looking towards my hotel.
Being that it's a chilly 13 degrees here in Northern Virginia, I am thinking of something hearty and some pasta and homemade foccacia bread would fit the bill. The following two recipes are from the cookbook Passione The Italian Cookbook by Gennaro Contaldo (who mentored Jamie Oliver) that I bought on this trip.  Contaldo was born in Minori on the Amalfi coast and started working in the local restaurants when he was 8 years old. This cookbook features beautiful photographs of the Amalfi coast and the book title is taken from the name of  his restaurant in London, Passione (that closed in 2009, a victim of the poor British economy).

The photographs in this book and recipes take me back to a lovely vacation in Amalfi.

Ingredients for the simple pasta dish.

 CONCHIGLIONI RIPIENI AL FORNO (Baked pasta shells filled with cheese)

Ingedients:
16 large pasta shells
1 recipe Salsa di Pomodoro (below)
3 tbsp freshly grated Parmesan cheese
1 ball of mozzarella cheese, sliced

For the filling:
5 oz ricotta cheese
1 ball of mozzarella cheese, very finely diced
2 tbsp freshly grated Parmesan cheese
16 large fresh basil leaves
Salt and freshly ground black pepper

Preheat the oven to 400 degrees.
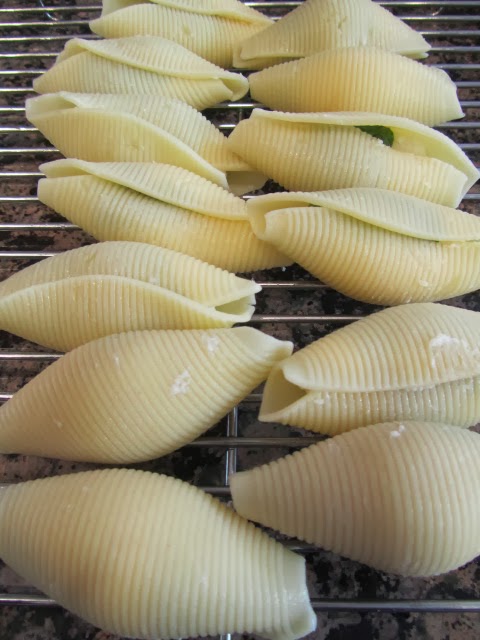
Cook the pasta shells in lightly salted boiling water until al dente. Drain well and leave to cool.
To make the filling, mash the ricotta with a fork, stir in the diced mozzarella, Parmesan, and some salt and pepper to taste and mix well. Shape the mixture into 16 balls, wrap each ball in a basil leaf and place in a cooled pasta shell.

Pour a layer of tomato sauce over the bottom of an oven proof dish and place the filled shells on top. Pour the remaining tomato sauce, sprinkle over the Parmesan and top with slices of mozzarella. Cover with aluminum foil and bake for 35 minutes. Remove the foil and baked uncovered for 5 minutes. Serve immediately.

Notes: I used 2 balls of mozarella, about 2 1/2" in diameter for the filling . I used one of those small scoops to make the balls. I ended up with 13 mozarella balls total, not 16, and I don't think they were exceptionally large or anything. So I did not try to make them in to 16 balls since there were only 2 of us eating, not 4. Also, if you buy a large can of tomatoes, only one is required. I also weigh all my ingredients, as is in the recipe.

Fresh basil smells amazing!

Mozarella balls.
Finished mozarella balls.

Stuffed pasta shells, ready for their tomato bath!

SALSA DI POMODORO (Basic Tomato Sauce)
Makes enough for 4 servings of pasta

Ingredients:
4 tbsp olive oil
2 garlic cloves, finely chopped
2 x 400g tins of plum tomatoes
A handful of chopped fresh basil
Salt and freshly ground black pepper

Heat the olive oil in a small frying pan, add garlic, and sweat until softened. Then add the tomatoes and basil, season with salt and pepper and simmer gently for 25 minutes.

Simple tomato sauce.

Ready for the oven.

Let's get this on the table!
  
FOCACCIA  CON AGLIO E ROSMARINO (Focaccia with garlic and rosemary)

Ingredients:
11 oz of all-purpose flour
7 oz semolina, plus extras for sprinkling
2 tsp salt
½ oz fresh yeast
12 fl oz. lukewarm water

For the topping:
2 tbsp extra virgin olive oil
2 large garlic cloves, finely chopped
Needles from 3 fresh rosemary branches, finely chopped
1 tsp flaky sea salt
Freshly ground black pepper

Ingredients for the dough.
Preheat the oven to 465. You will need a baking sheet, about 15” x 11”.
In a large bowl, mix the flour, semolina and salt together. Dissolve the yeast in the lukewarm water and pour into the flour. Mix well until you obtain a soft, but not sticky, dough. Turn out onto a lightly floured work surface and knead well for about 5 minutes, until smooth and elastic. Place dough on a clean tea towel, brush the top with some water to prevent it from drying out, then cover with another tea towel. Leave to rise in a warm place till doubled (I let the dough rise an hour).

I am lazy and used my Kitchen Aid mixer with a dough hook to knead the dough; this worked perfectly fine.
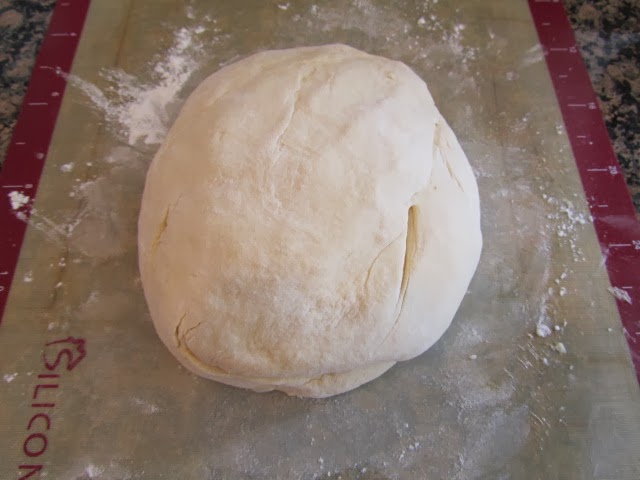
After removing the dough from the mixer, I gave it a few twirls on a floured silicone mat to shape.
 
I had room on my cookbook shelf which is near a sunny window and I put the dough here to rise.
Place the dough on a lightly floured work surface and roll the dough out into a rectangular shape the same size of the baking tray. Warm the baking tray in the hot oven for about 10 seconds, then sprinkle with semolina. Place the rolled out dough on the tray and pour the olive oil in the middle. With your fingers, spread the oil all over the dough. Leave on for 5 minutes, then poke the dough all over with your fingers to make indentations.  Sprinkle the garlic and rosemary on top, followed by the sea salt (I crushed mine slightly) and some black pepper. Leave to rise in a warm place for 30 minutes.

Make sure you sprinkle more semolina flour than this on the sheet pan!  I didn't use enough and it stuck a bit.

Chopped garlic and rosemary (smells amazing) . I didn't use all of this, I thought it might be too overpowering for my husband's taste.
Lovely flaked sea salt from Mallorca given to me by my daughter-in -law that she bought on a trip there.

Ready for second rise.
Bake for 15 minutes, until evenly browned.  Check the focaccia from time to time to make sure it is baking evenly, turn the baking pan accordingly. Once cooked, remove from the oven and immediately drizzle some olive oil all over. Leave to cool, then cut into squares.This bread is best eaten the day it is made, but will keep for a few days and can be freshened up in the oven just before serving.

 Focaccia with Garlic and Rosemary straight out of the oven.
 Notes: The focaccia bread can easily be made into several meals (I froze half of it) and would be great for sandwiches. You can also serve it warm with an herbed olive oil for dipping.  Before baking, you can add other ingredients (olives, tomatoes, etc...) to make it your way. Oh, and the stuffed shells....my husband had two servings, so I know it was good!

Some more recipes from the author can be found online on Contaldo's website .

For my favorite dessert cookie made to go with this meal, I recommend Giada's Lemon Ricotta Cookies with Lemon Glaze .


What is your favorite meal on a cold winter's day?